
In the procedure of Japanese manicure, a special paste with vitamins and minerals is rubbed into a natural nail plate and then a layer of powder is rubbed on it. It results in healthy and good-looking nails. Japanese manicure is a method developed by the Japanese company P. Shine, hence the alternative name – manicure p.Shine. How to make this manicure step by step?
What is Japanese manicure?
This method of manicure involves intensive rubbing of green paste into the nail plate. The paste contains substances that nourish and strengthen the nails and give them a pink pearl shine. Those substances are silica from the Sea of Japan, bee pollen, keratin and vitamins A and E. Japanese manicure is a great way to cure splitting and brittle nails.
How to make Japanese manicure step by step?
Necessary tools
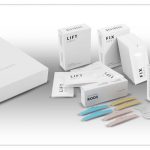
To make this kind of manicure yourself, you will need special paste and powder, double-sided file, plastic spatula for applying the paste and the powder and for removing the cuticles before the procedure.
Japanese manicure step by step
First, polish the top layer of the nail plate (before, if necessary, it can be shortened). Then, using a plastic spatula, push back the cuticles. The paste should be rubbed into the nail plate with energetic movements. Then, apply the powder on the nail, which should also be rubbed into it. After that, massage both the paste and the powder in one direction using a buffer; the green side is used to rub the paste, the pink to rub the powder.
Japanese manicure – effects
In Japanese manicure you should not use metal nail files to cut the cuticles or file the nails. Once made properly, the effect is perfectly smooth and shiny nails. It is easily noticeable soon after the treatment. To maintain the effect, it should be repeated 3-4 times within 3 weeks.
Japanese manicure and hybrid manicure
It’s not recommended to make a hybrid or a classic manicure just after the Japanese manicure. Japanese manicure is very oily, so those type of treatments should be done after a day or two.


Leave a Reply